Short Range
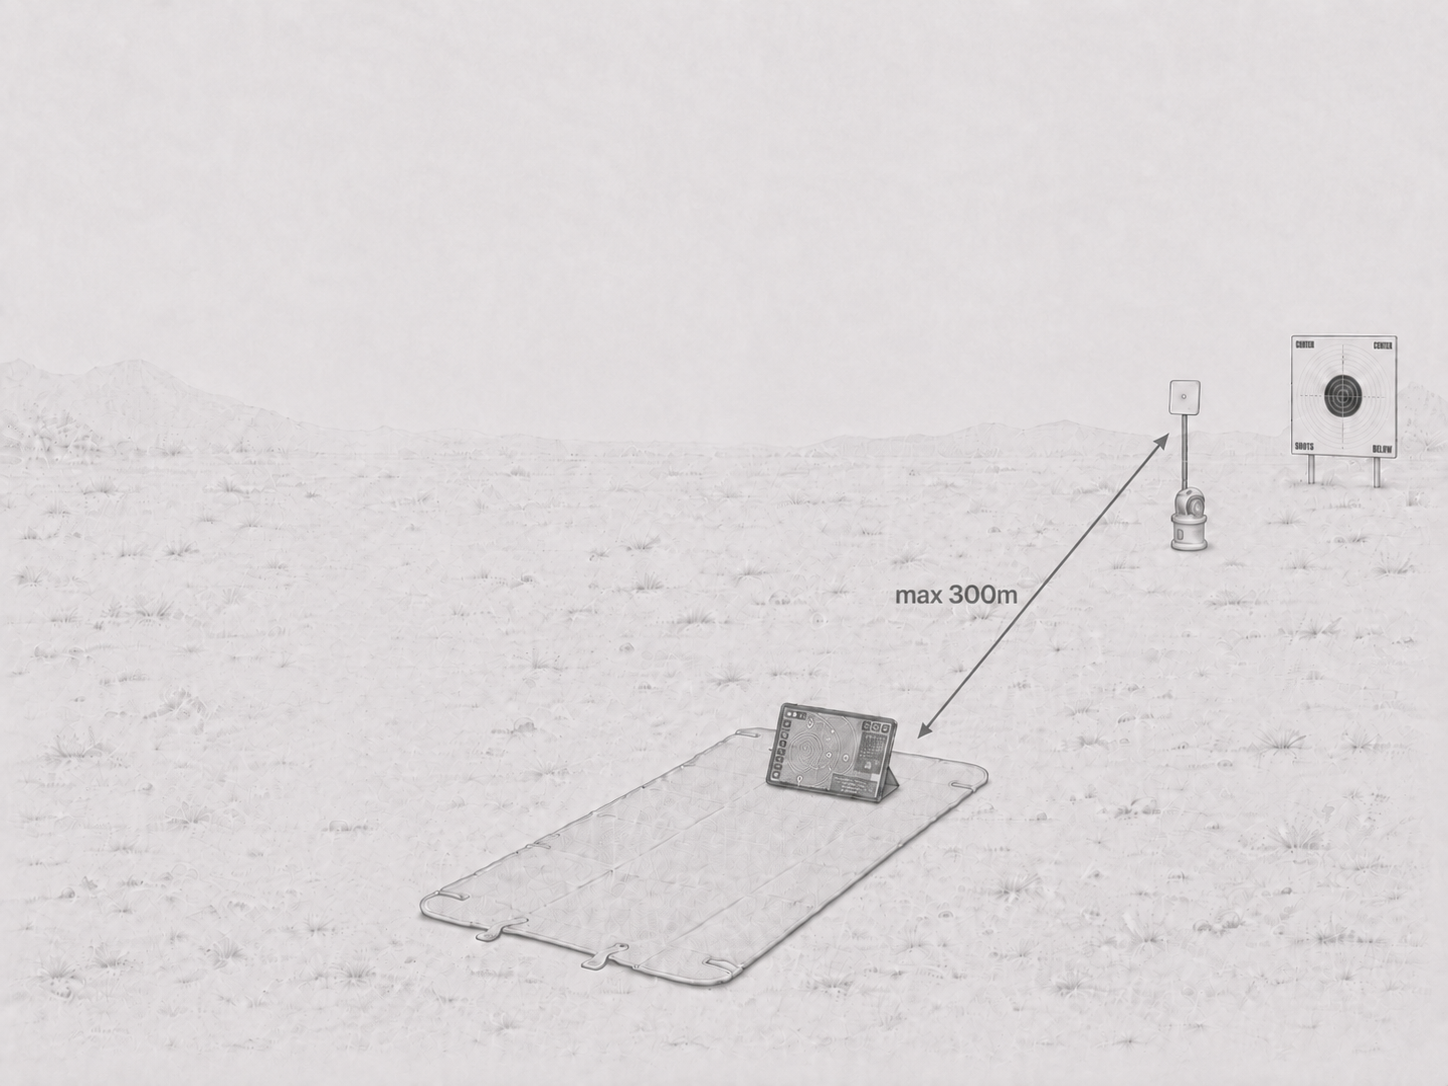
300 mThe tablet connects directly to the Wi-Fi access point created by one camera. No Long Range unit is required.
Before you start
This guide takes you from choosing the correct radio setup to a stable, processed target view in the SniperCam application.
The tablet is connected to the SniperCam network, the application sees the camera, and the selected target is displayed in the corrected view.
Pre-flight check
System layout
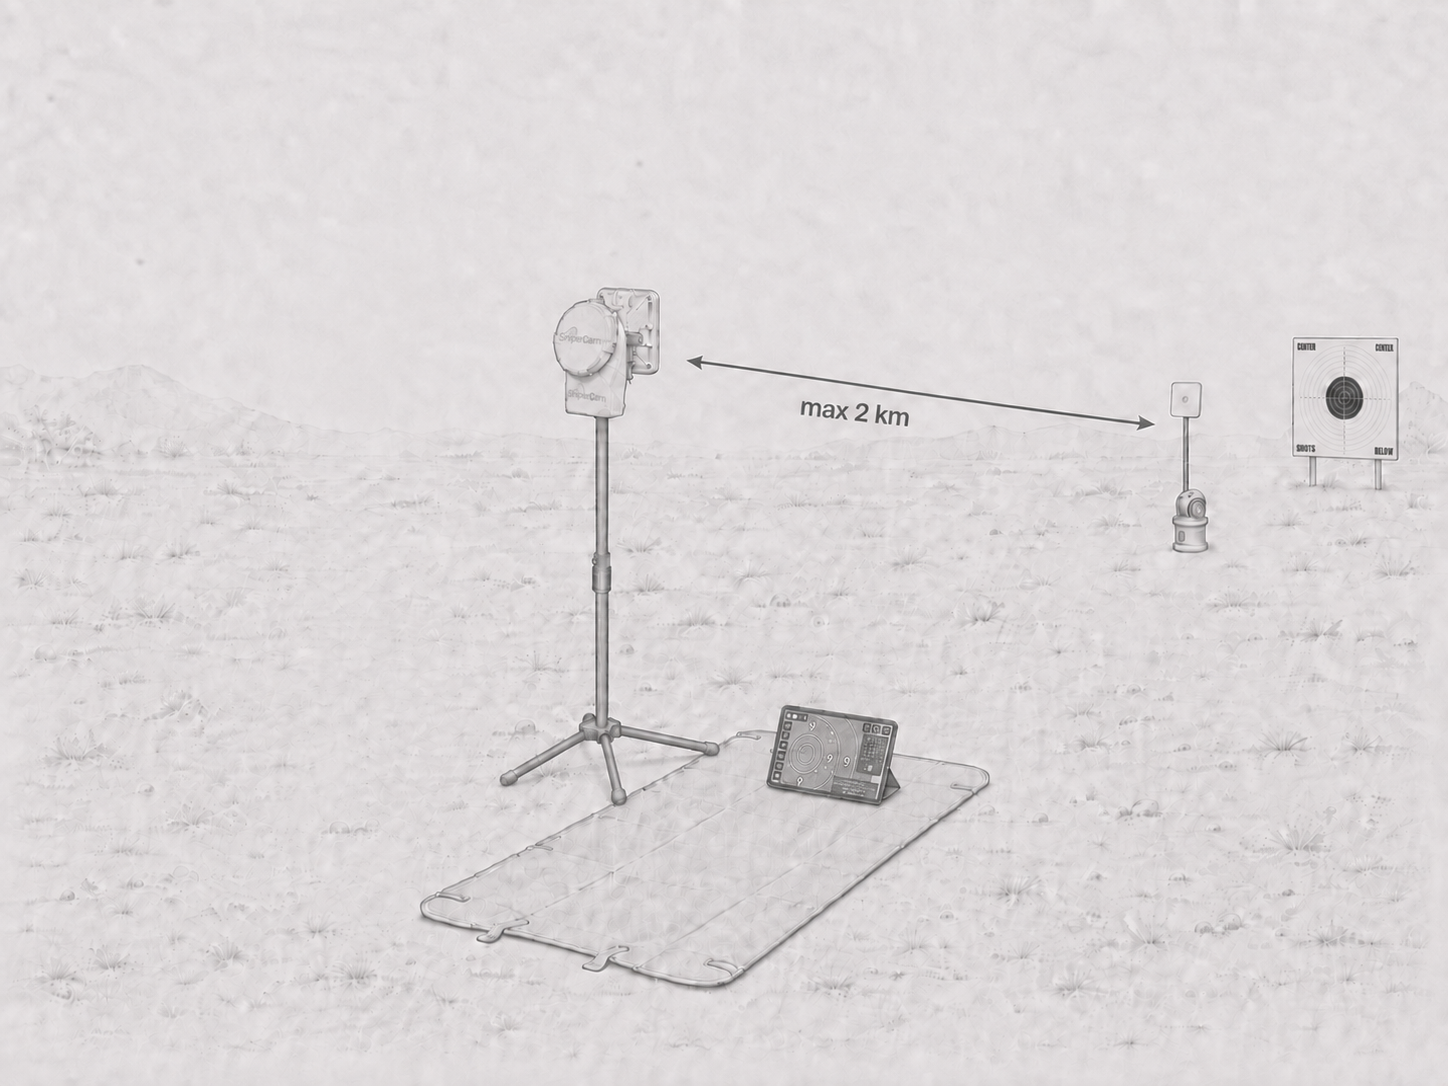
Use Short Range for a direct tablet connection. Add a Long Range unit when the firing position is farther away or when several cameras share one station.
The tablet connects directly to the Wi-Fi access point created by one camera. No Long Range unit is required.
Place the Long Range unit at the firing position. It links the tablet station to the target-side camera.
A single Long Range station can communicate with up to five cameras. Select the required camera in the application.
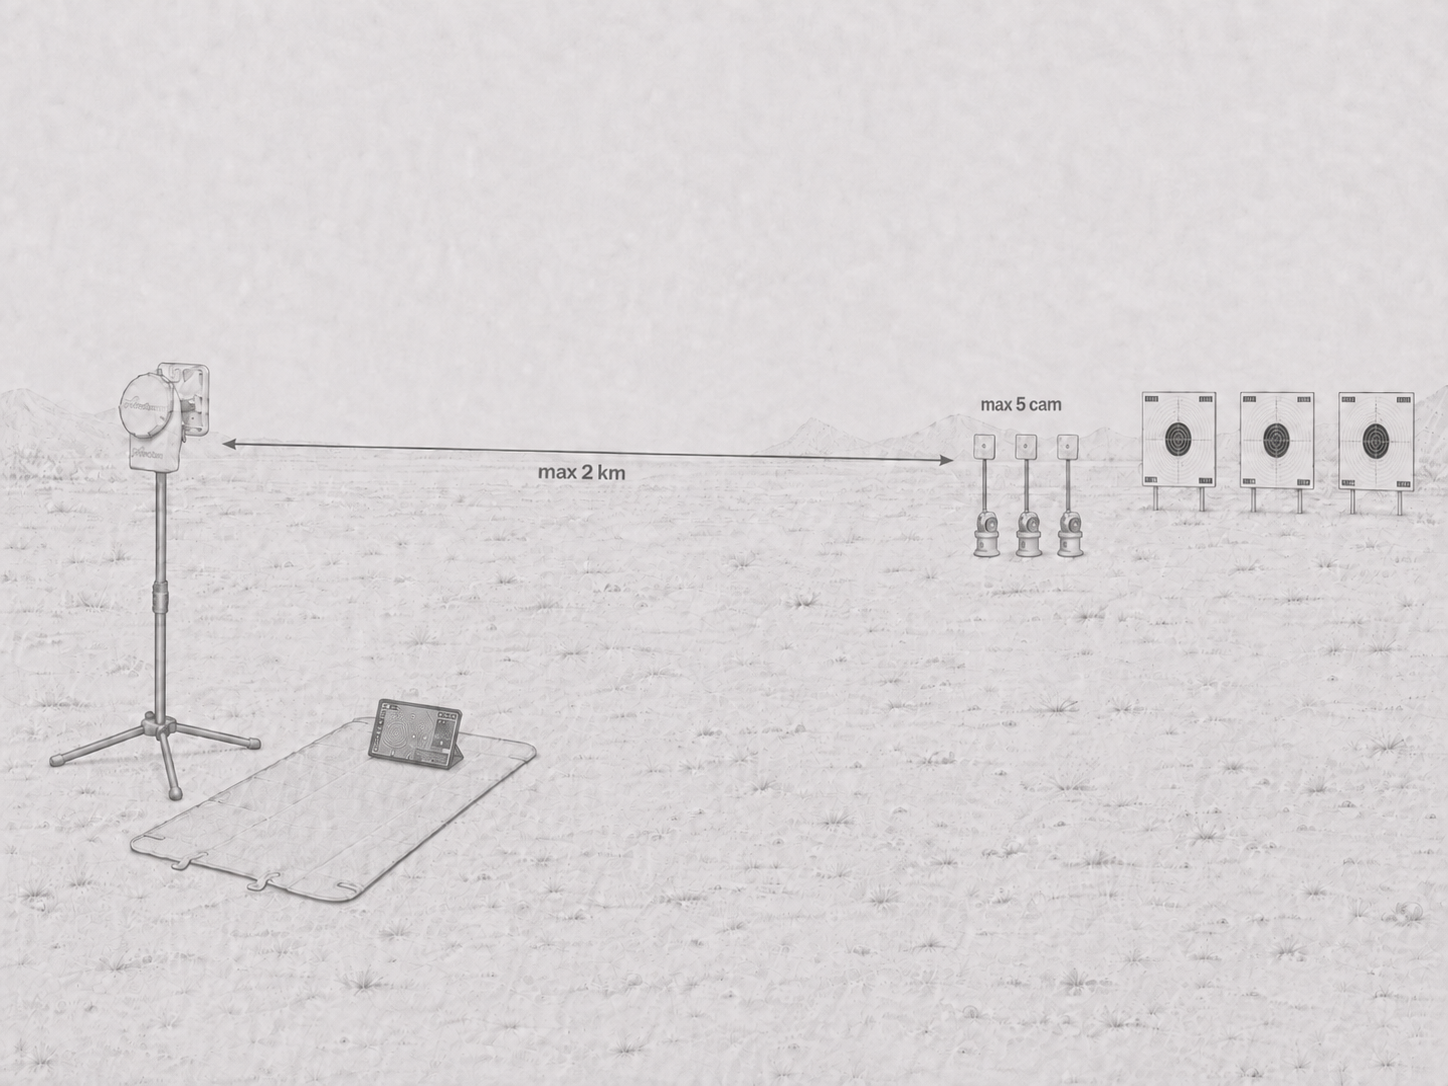
The stated distances require clear radio visibility. Terrain, obstacles, antenna alignment, and local interference can reduce the practical range.
Target-side equipment
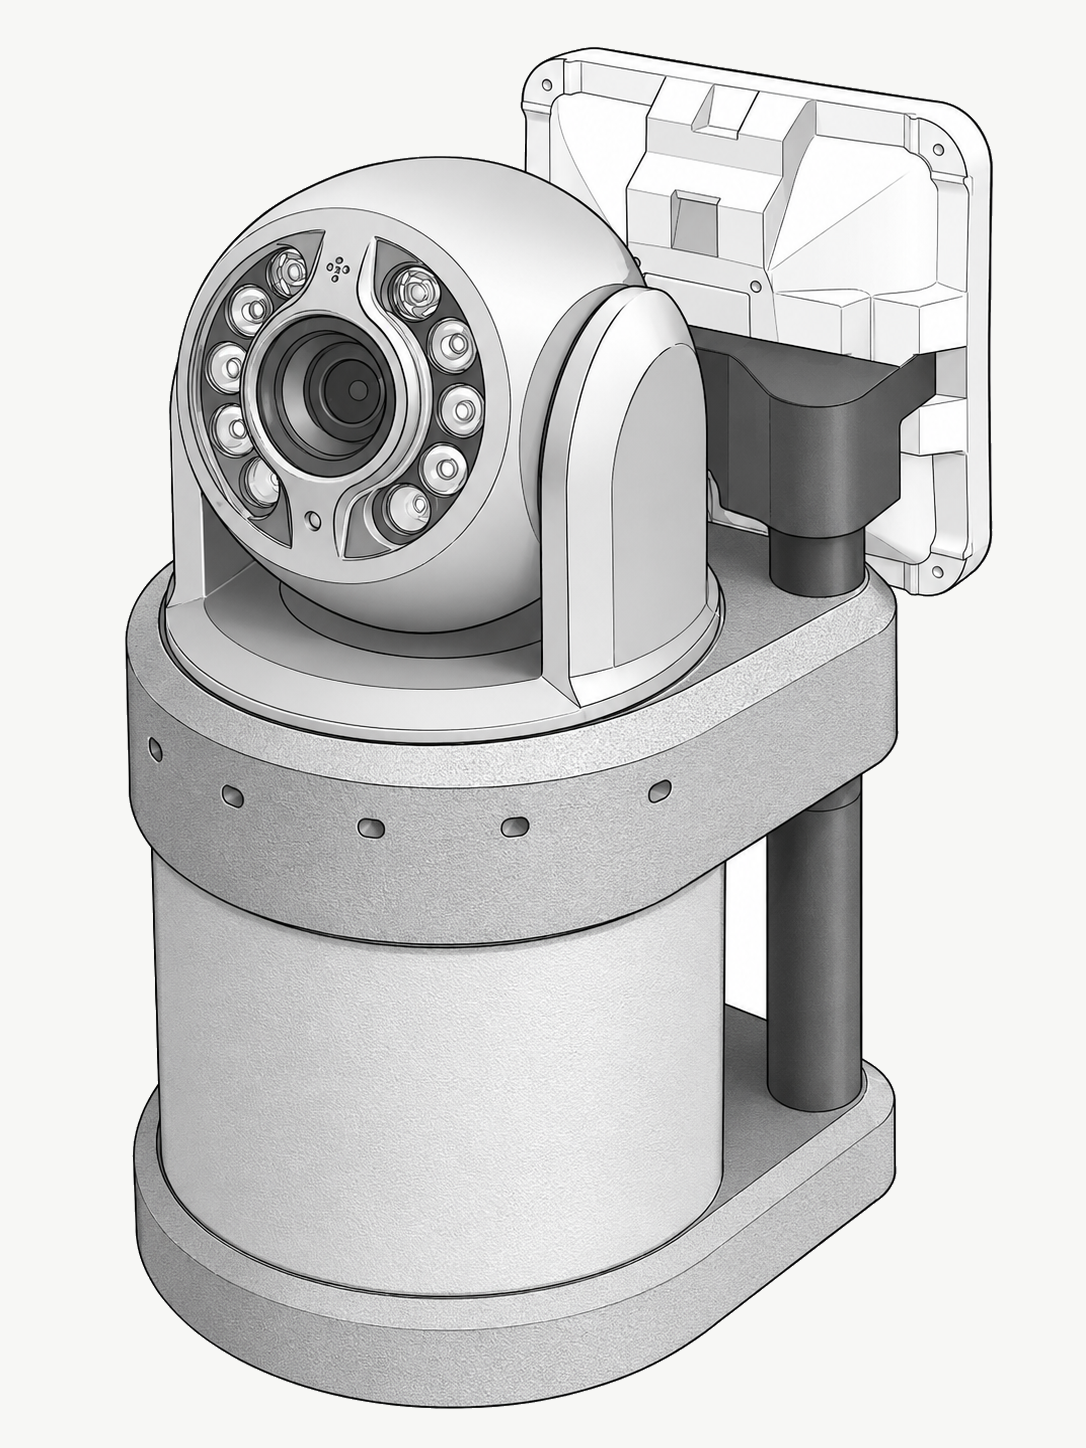
Position the camera with an unobstructed view of the complete target. Then extend the antenna and connect the internal power bank.
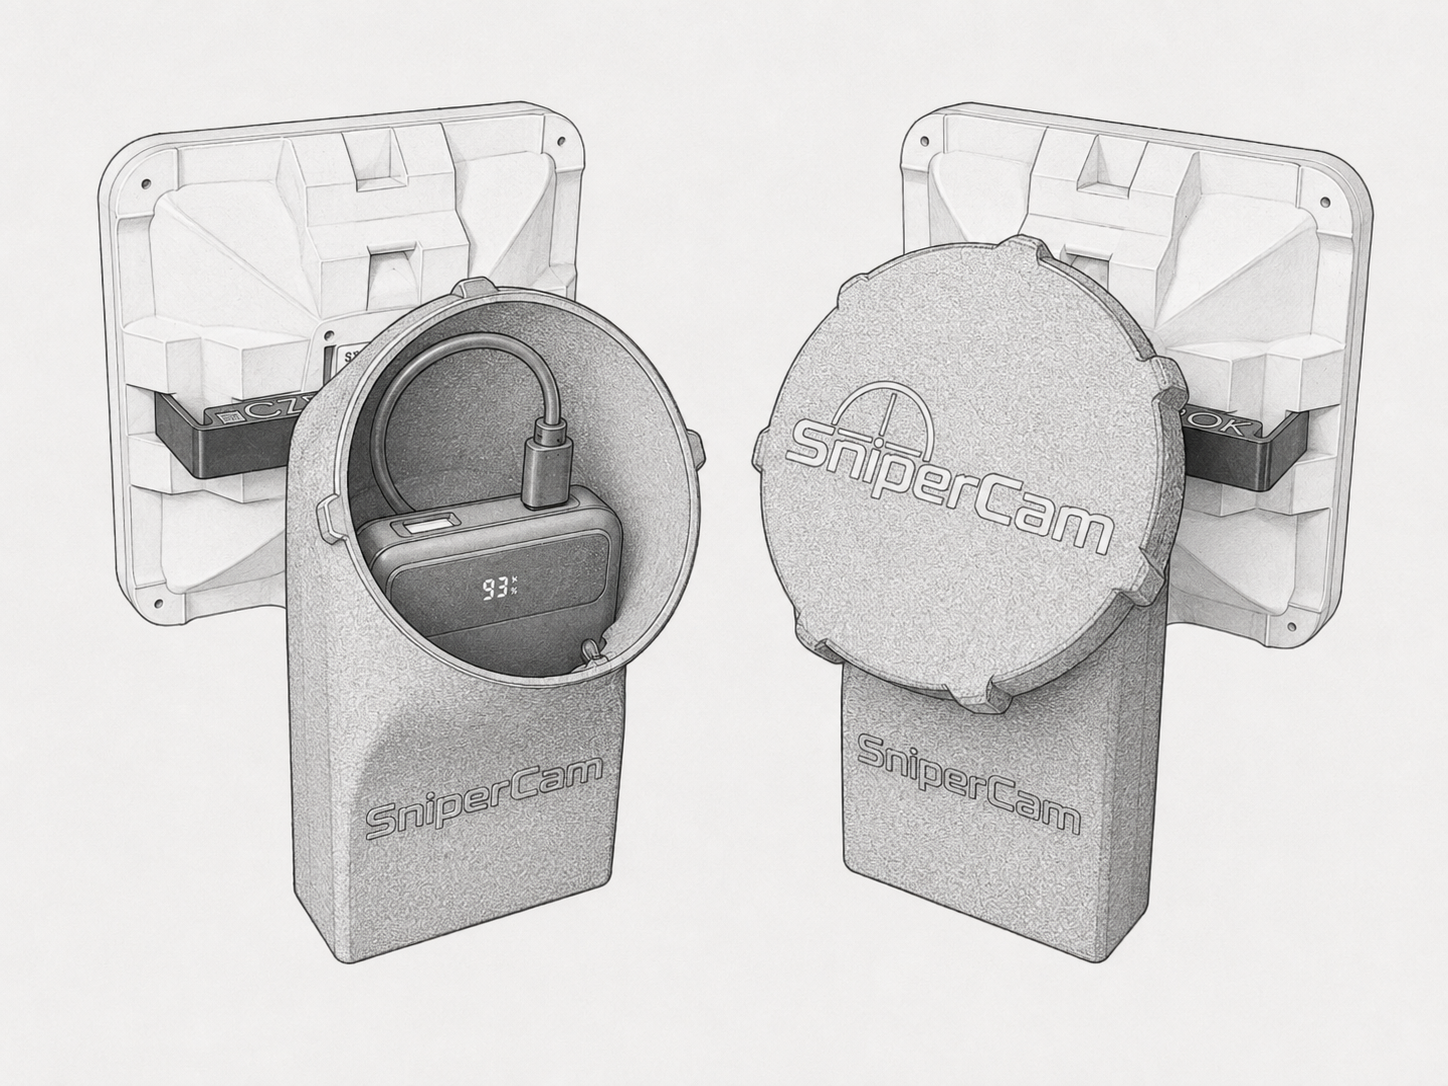
Hold the cap securely, rotate it to unlock, and lower it in a straight line. The power bank remains attached to the cap.
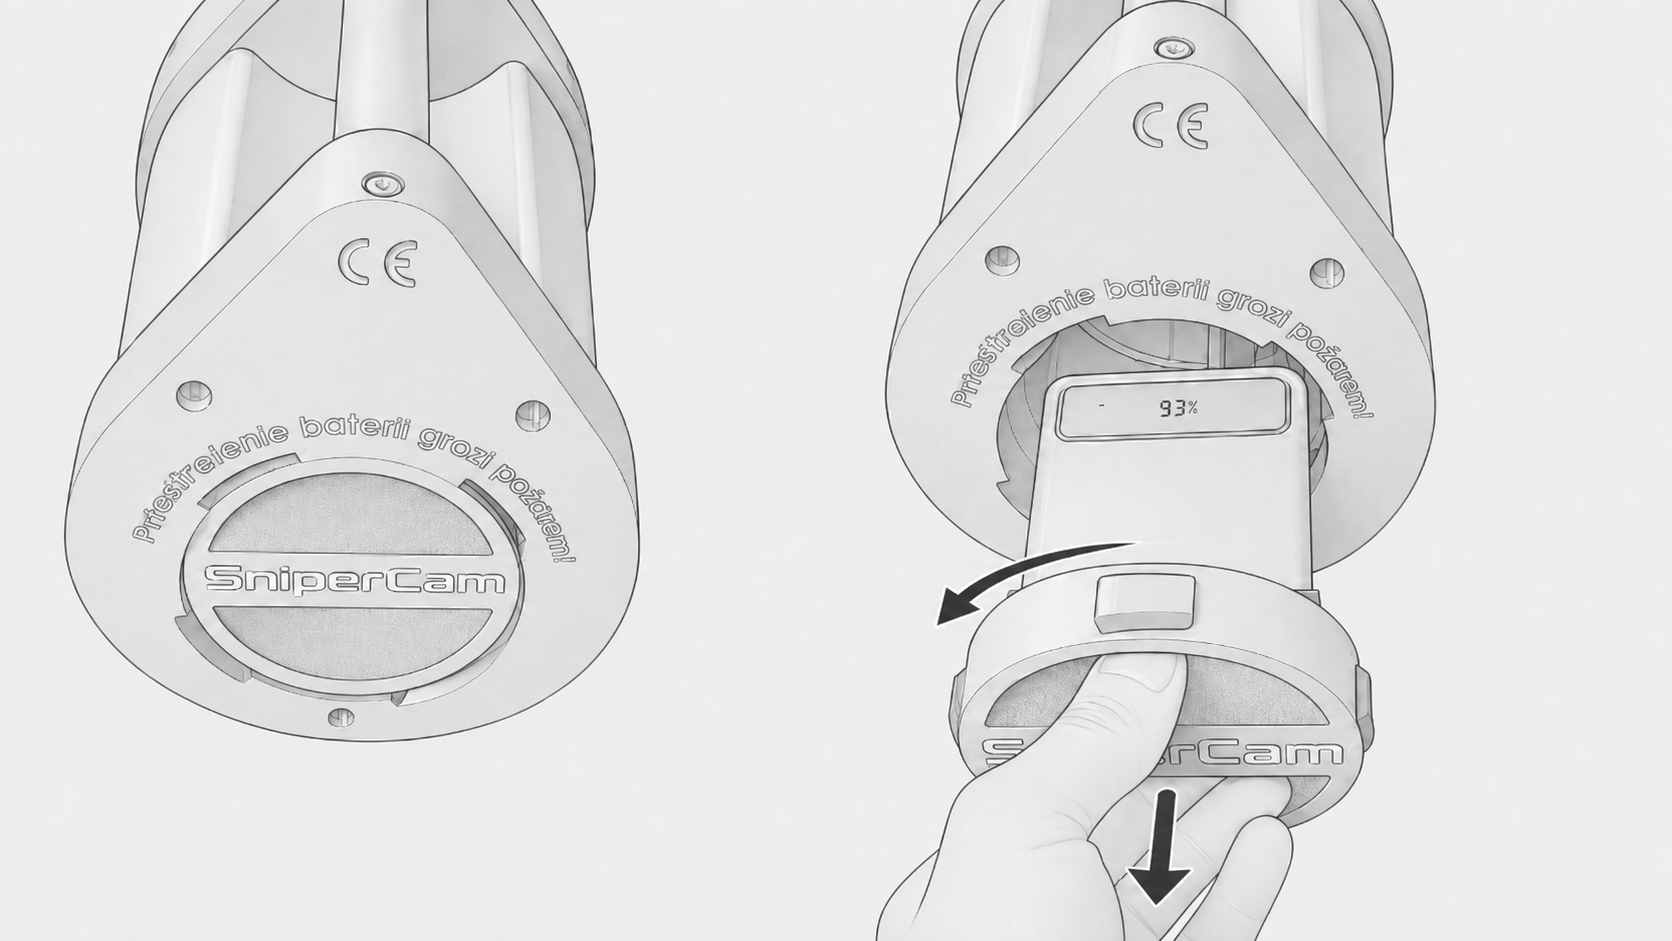
Do not use sharp tools and do not pull the assembly by its cable. A punctured lithium battery can ignite.
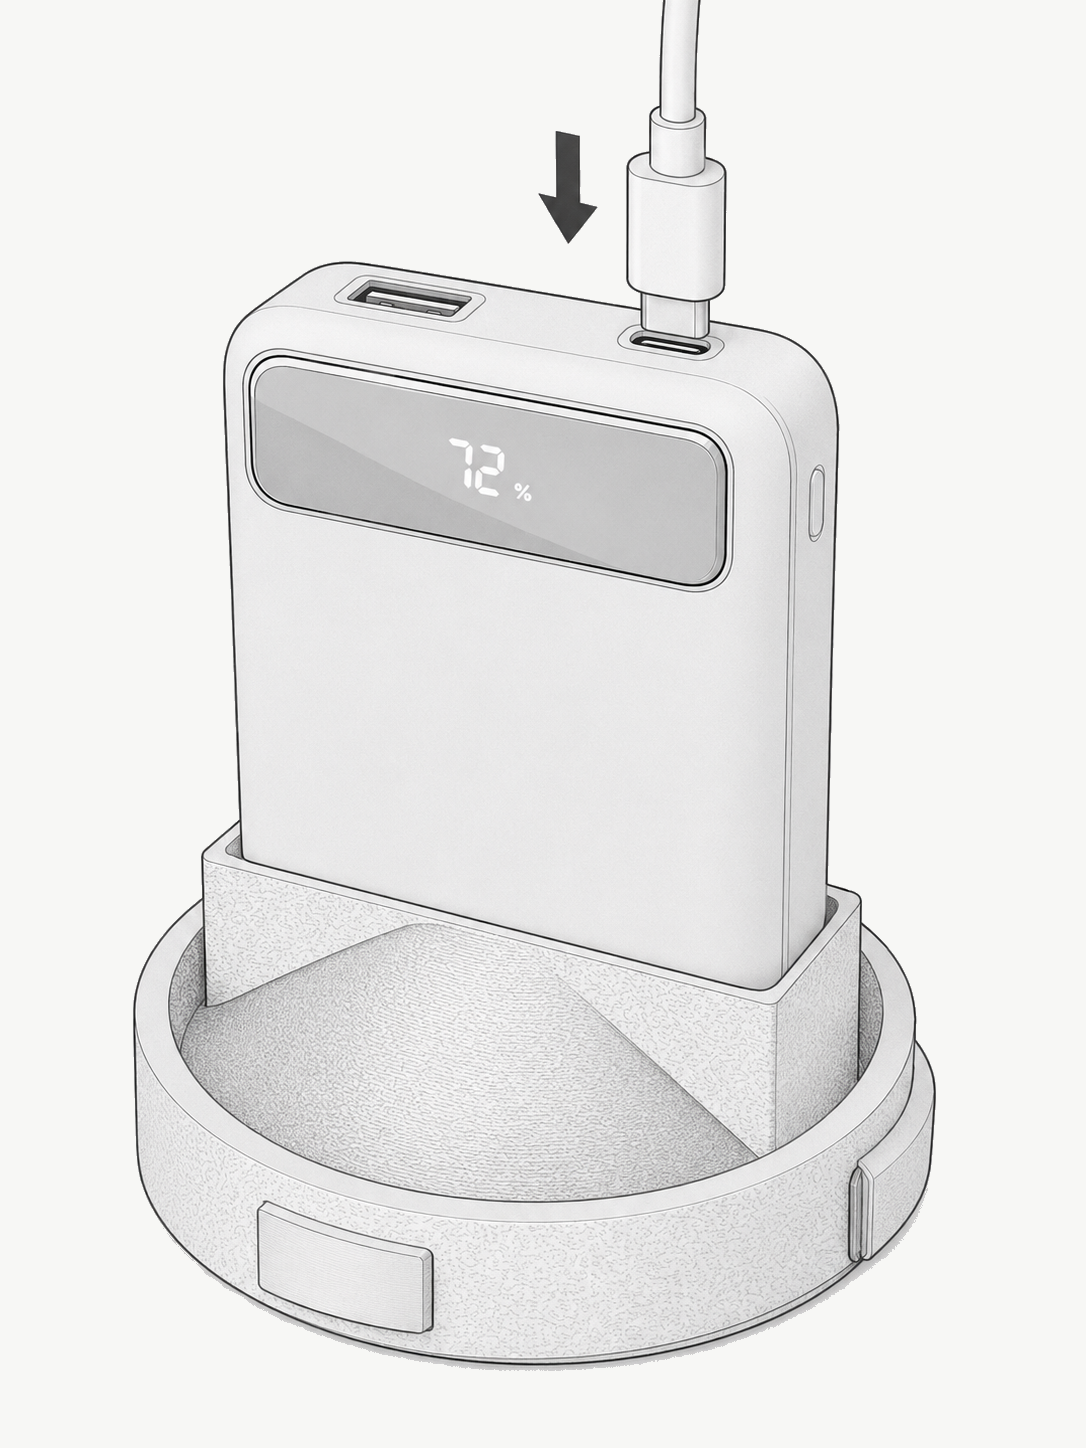
Insert the camera's USB-C plug fully into the power bank. Return the assembly to the housing and lock the lower cap without pinching the cable.
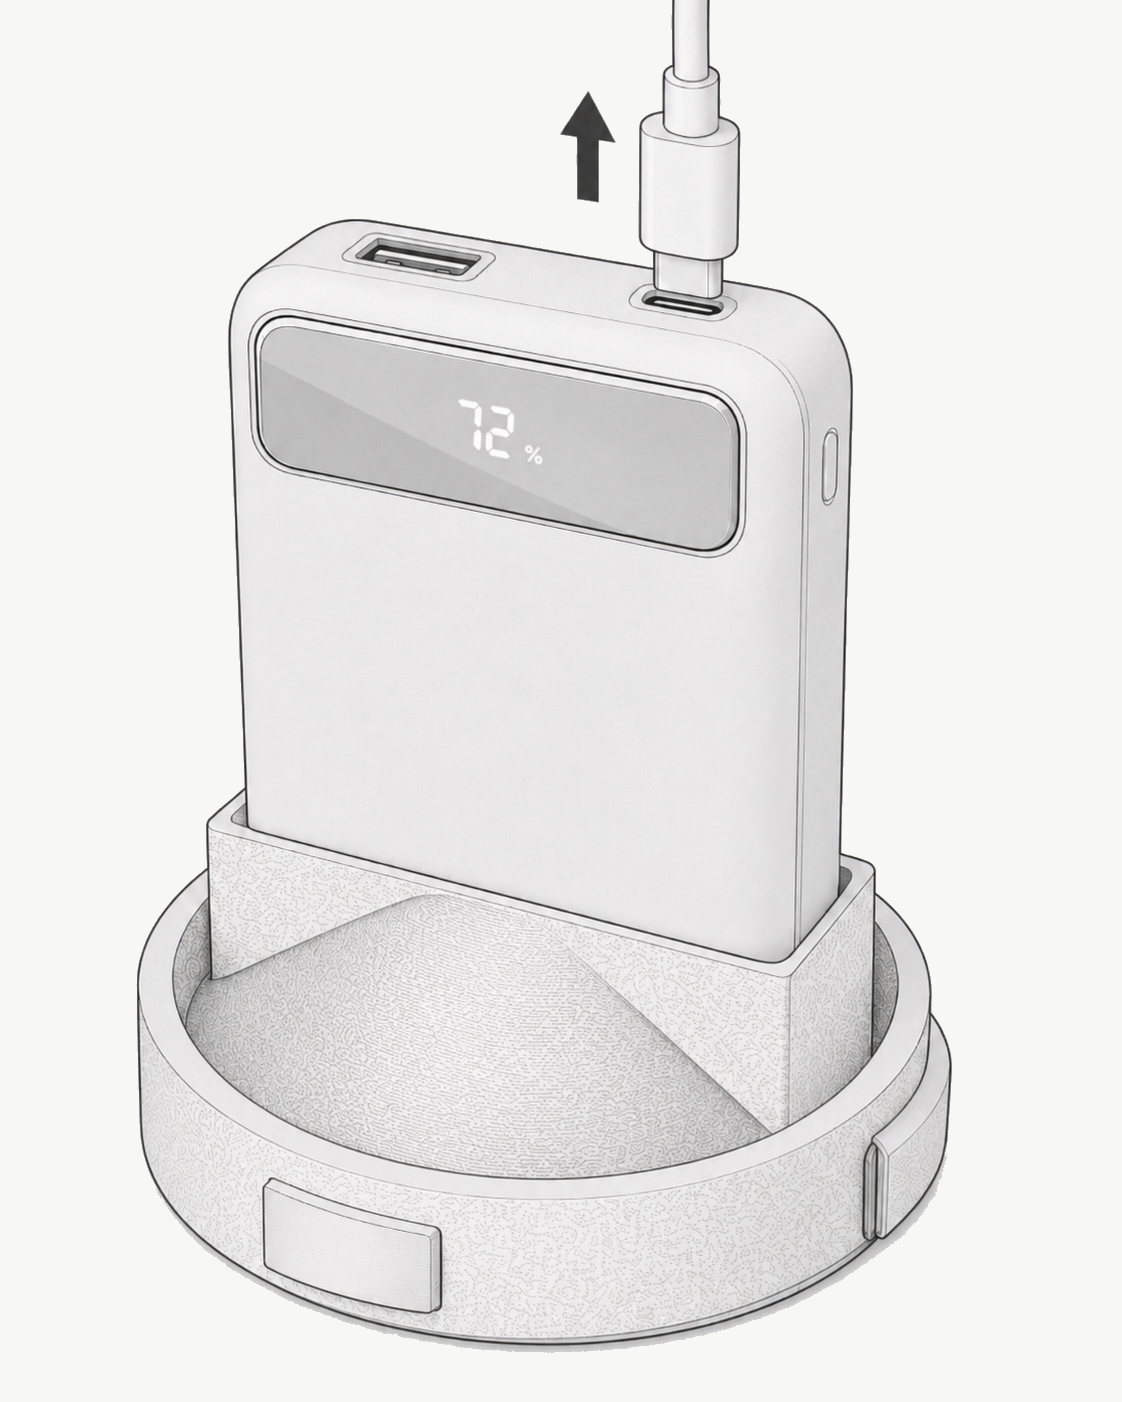
To switch the camera off, remove the cap and pull the USB-C connector straight out while holding the plug, not the cable.
Lift the telescopic holder from its transport position and extend it fully. Make sure the antenna is clear of the camera body.
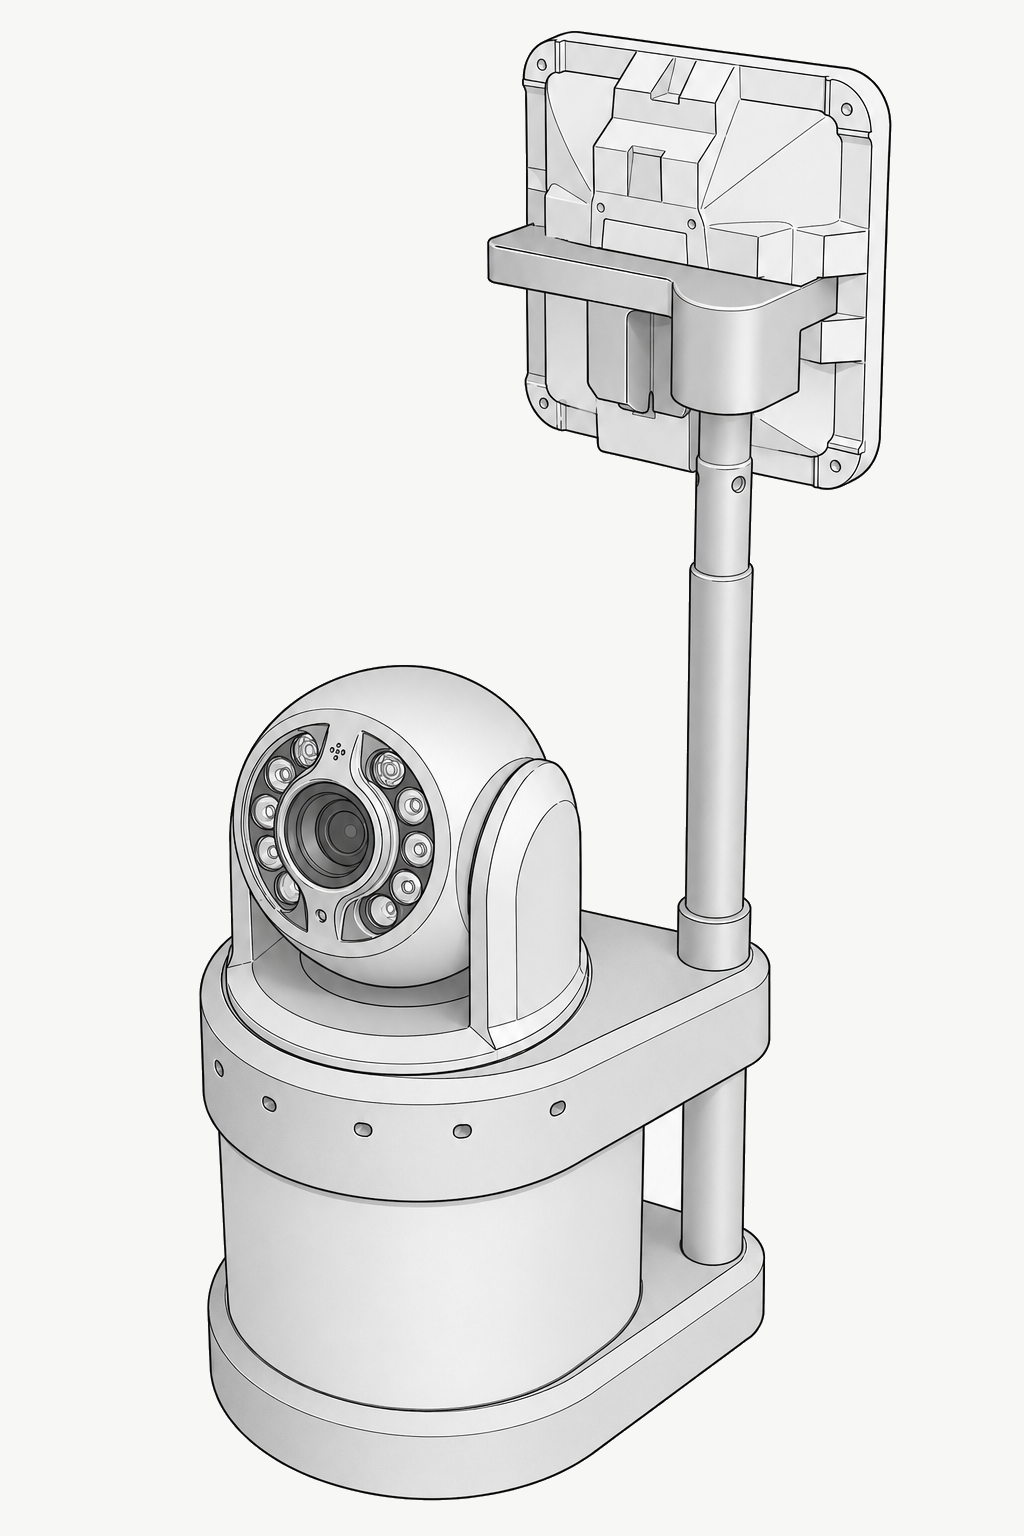
After connecting the power bank, the radio unit usually needs approximately three minutes to create or join the SniperCam network. Radar Detection can extend this time.
Optional range extension
Skip this chapter for a Short Range setup. For Long Range, place the directional antenna close to the tablet at the firing position.
Camera antennas continuously scan for a Long Range repeater. When one is detected, they connect to it automatically; no manual pairing is required.
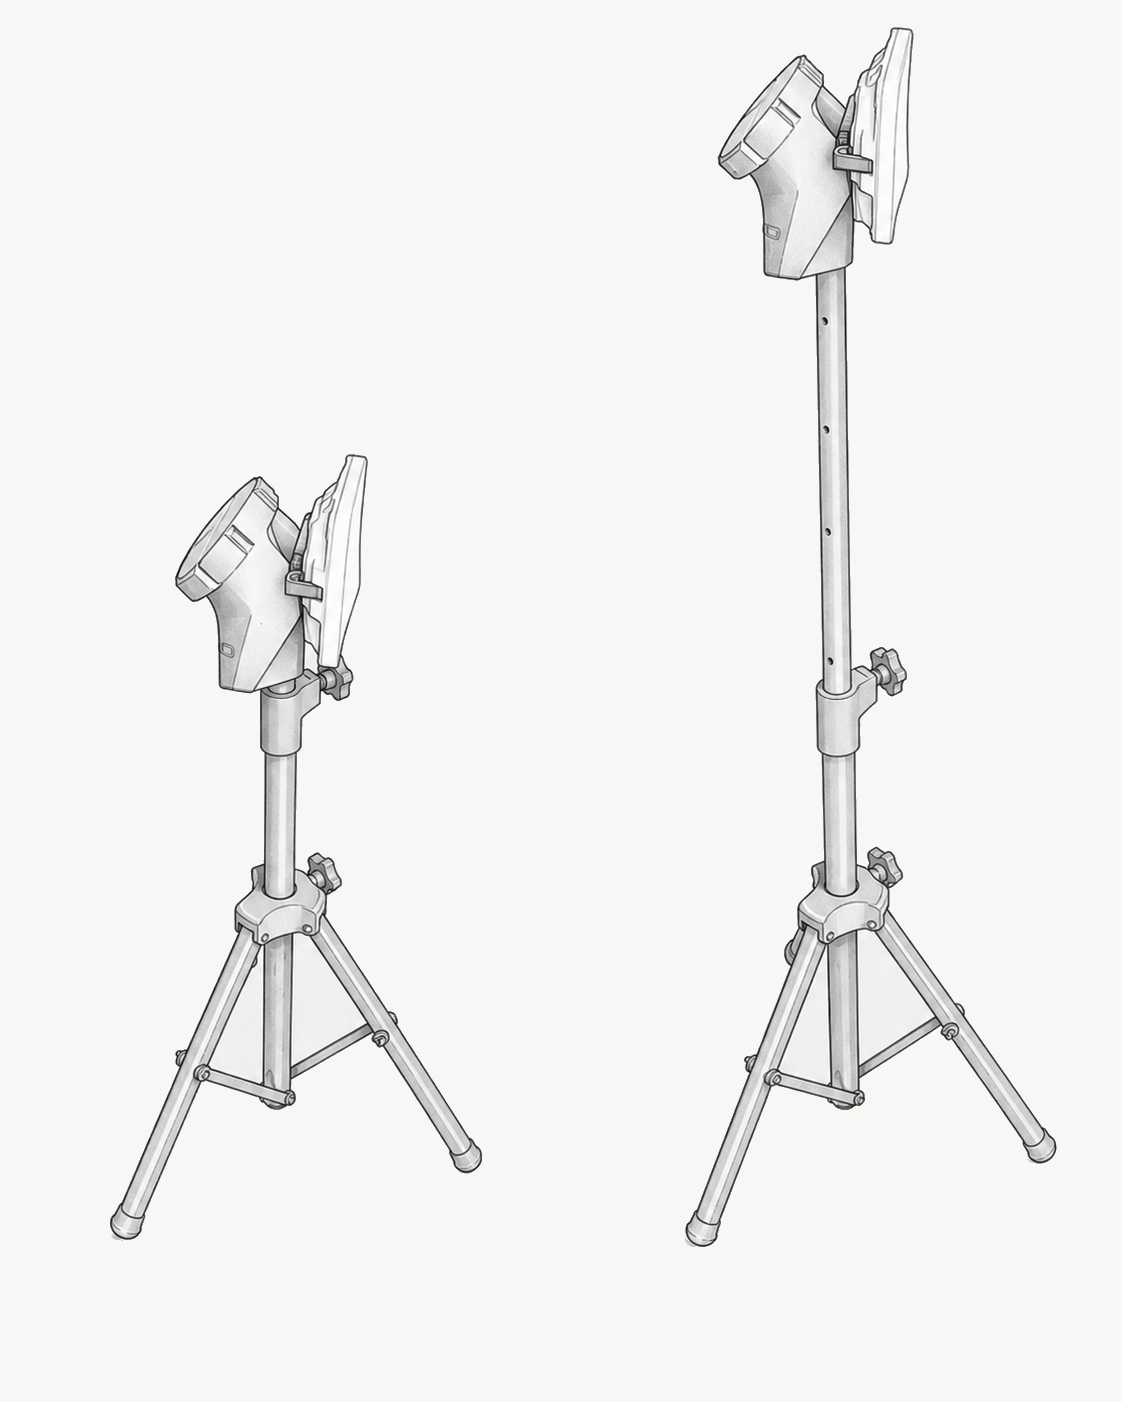
Spread the tripod legs on firm ground. Extend the mast, tighten all locks, and point the flat face of the directional antenna toward the target-side camera.
Open the round cover, connect the power bank, place it fully inside the enclosure, and close the cover securely.
Both directional antennas should face one another as directly as possible. Avoid trees, buildings, vehicles, and terrain directly between them.
Radio readiness
Check the indicators on the rear of the directional antenna before connecting the tablet. Indicator colors can vary slightly between antenna models.
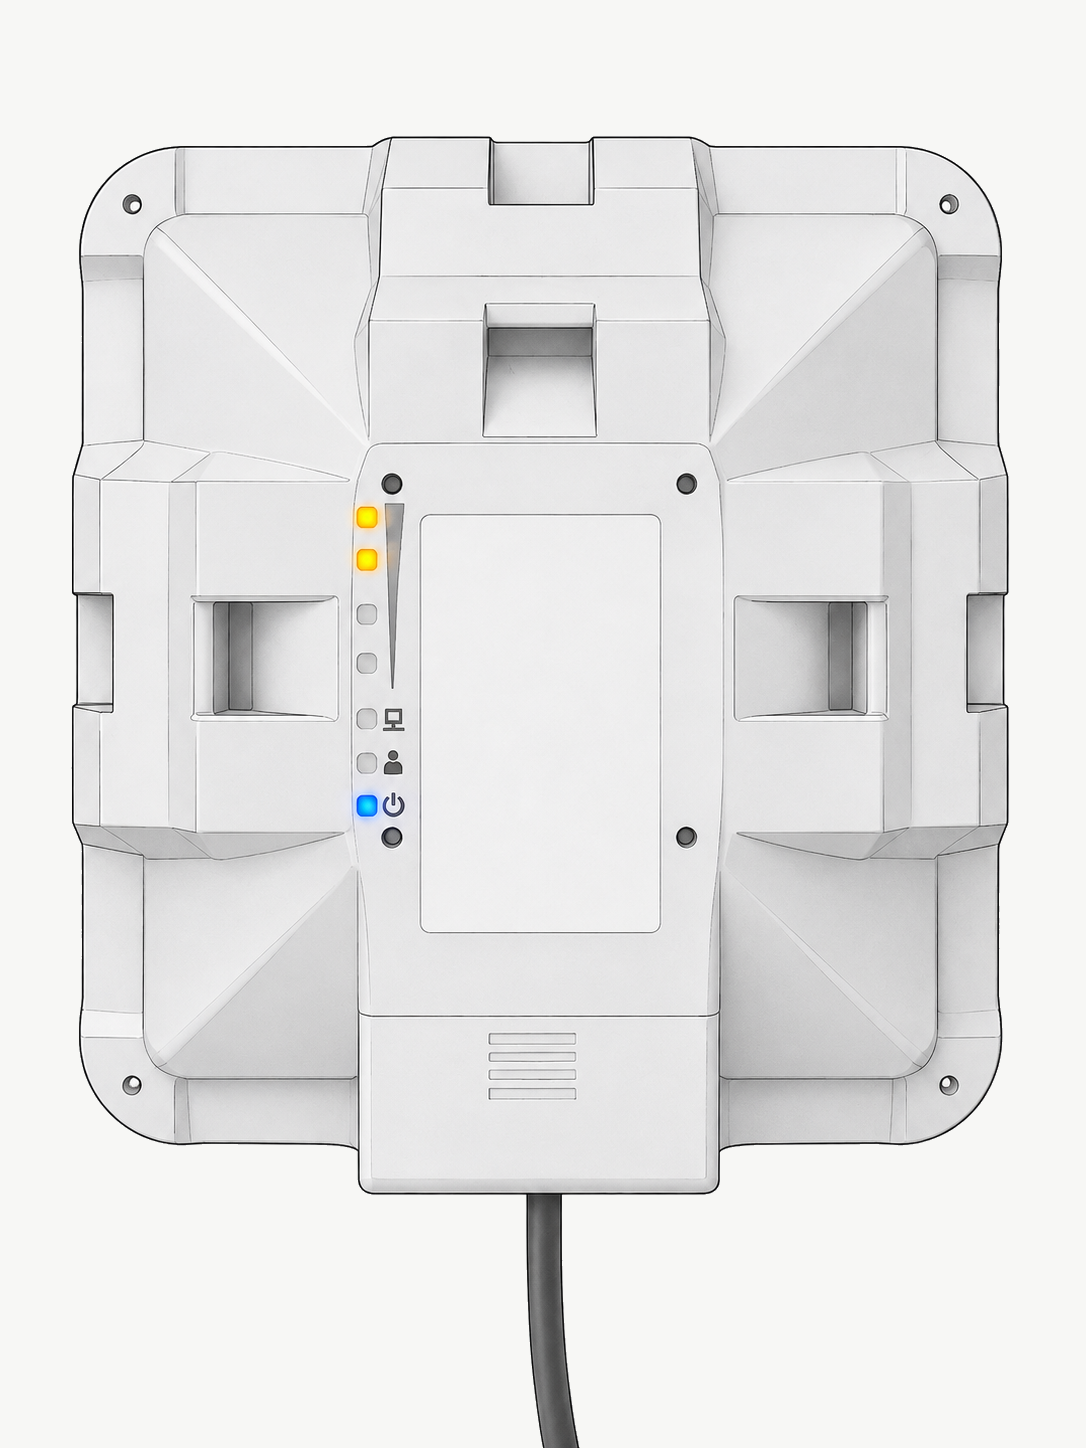
The antenna is receiving power.
The radio network is ready. Continue with the tablet connection.
Radar detection is still scanning. Wait until both upper indicators remain on.
The unit has created its Wi-Fi access point.
The camera antenna has created its own Wi-Fi access point.
The camera antenna has connected to the Long Range unit.
Radar Detection can make startup take longer. Do not troubleshoot the Wi-Fi connection while an upper indicator is still flashing.
Tablet connection
The SniperCam radio network is local and intentionally has no Internet access. The tablet must remain on this network while you use the camera.
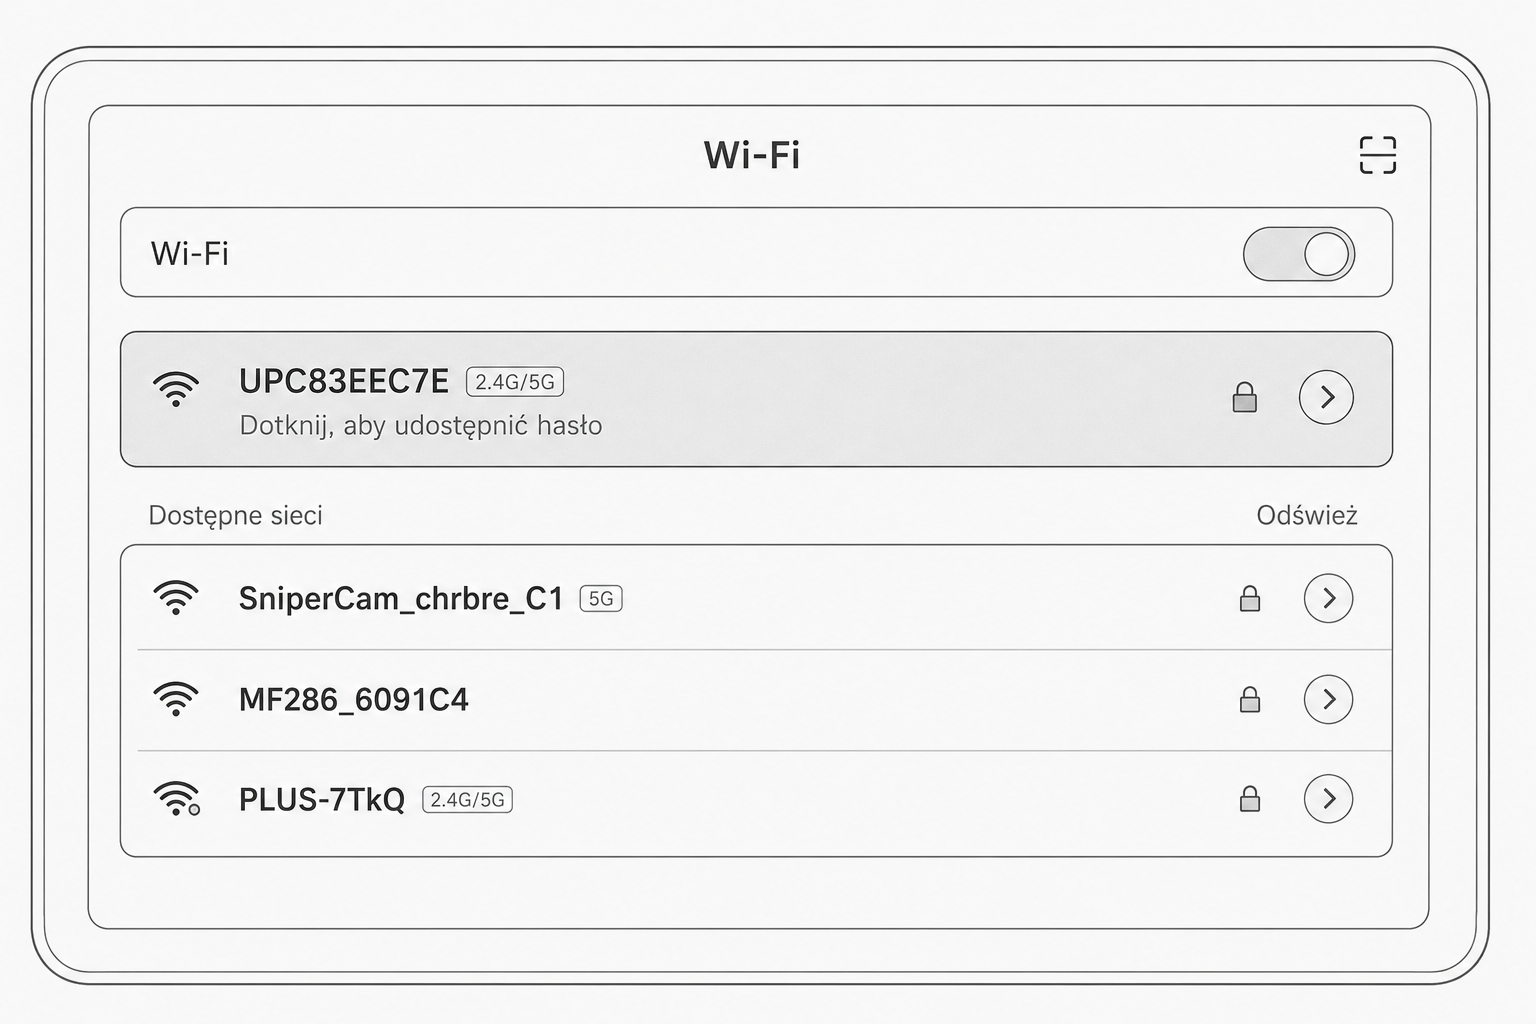
Open the tablet's Wi-Fi settings and select the network supplied by the camera or Long Range station. In this example, the SSID is SniperCam_chrbre_C1.
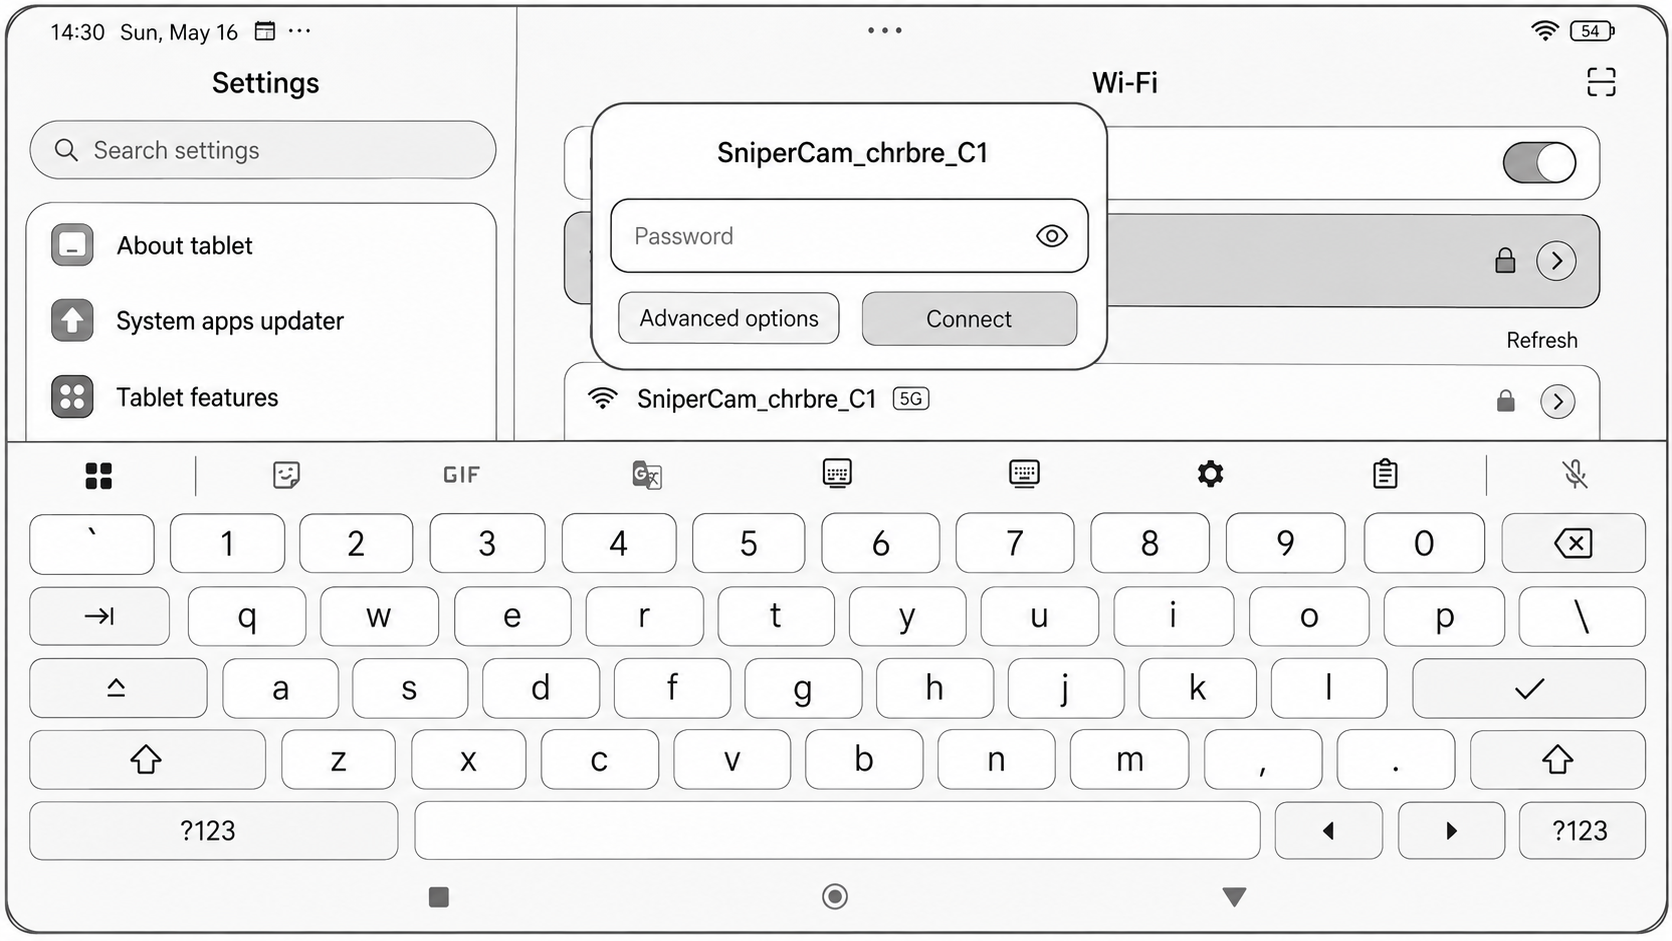
Enter the password supplied in the email for your order, then select Connect.
If Android warns that the network has no Internet access, choose Yes or Stay connected. Otherwise the tablet may switch to another saved network and lose the camera connection.
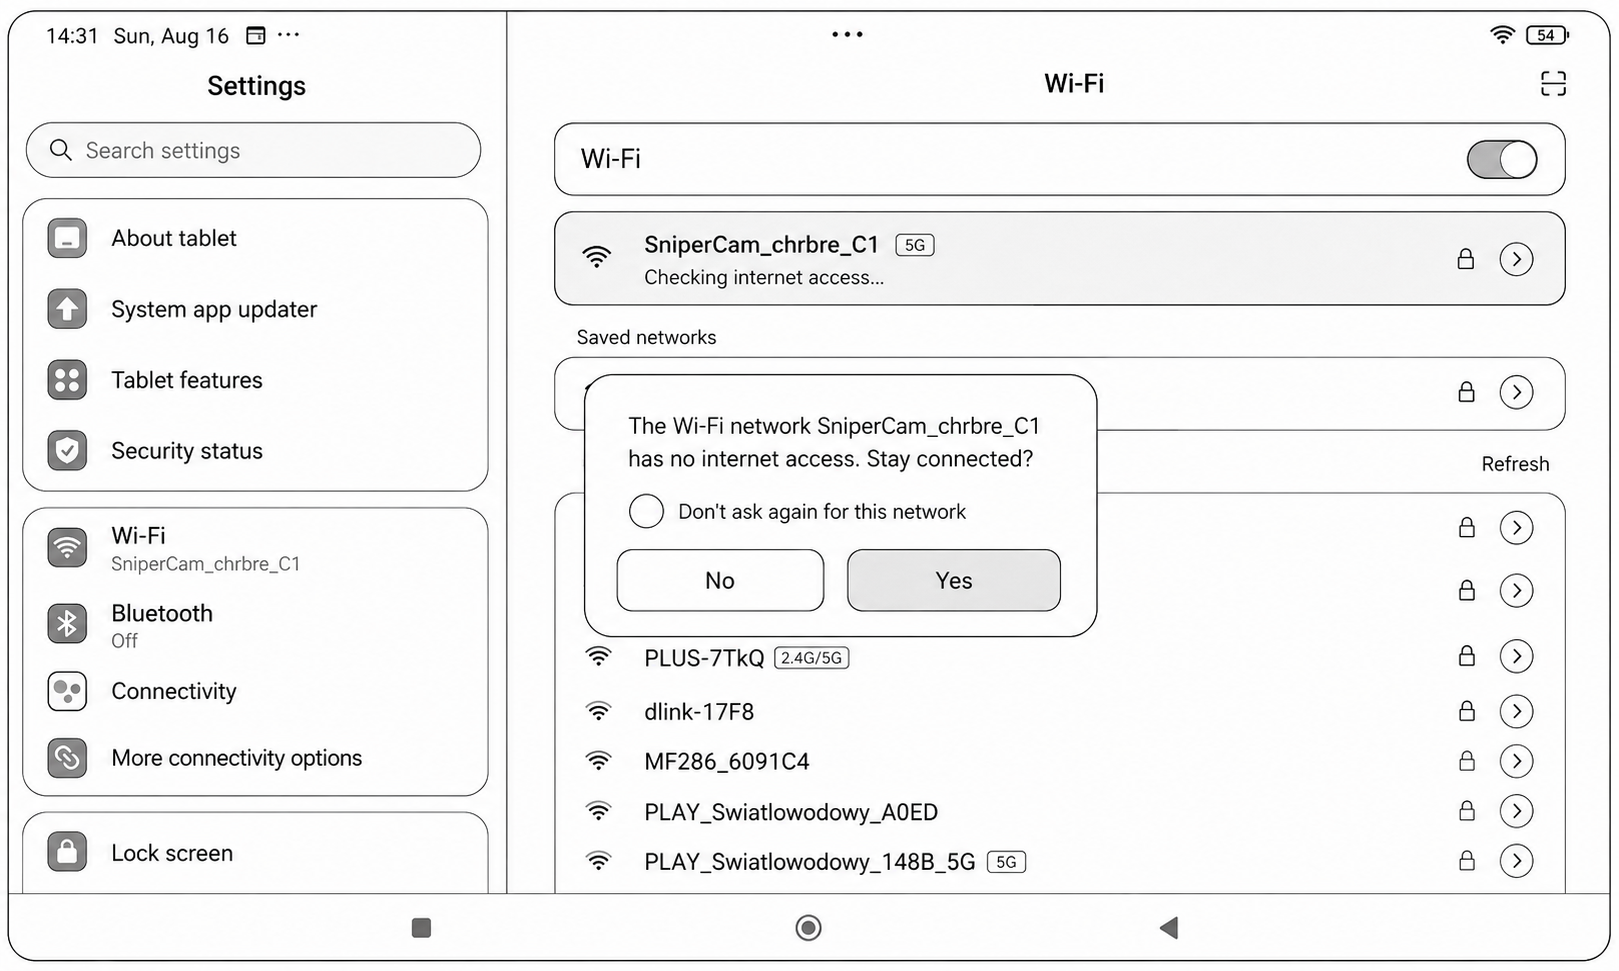
The absence of Internet is expected. Keep this Wi-Fi connection active and launch the SniperCam application.
Camera alignment
The application discovers cameras available on the current SniperCam network. Select a camera, frame the target, and choose the matching target type and distance.
Launch SniperCam and select the button for the discovered camera in the lower-left corner. A connected camera has a green status dot.
Use the on-screen controls to:
The better the target is framed and focused, and the more of the video area it occupies while all markers remain visible, the higher the resolution of the perspective-corrected image and the more reliable the bullet-hole detection.
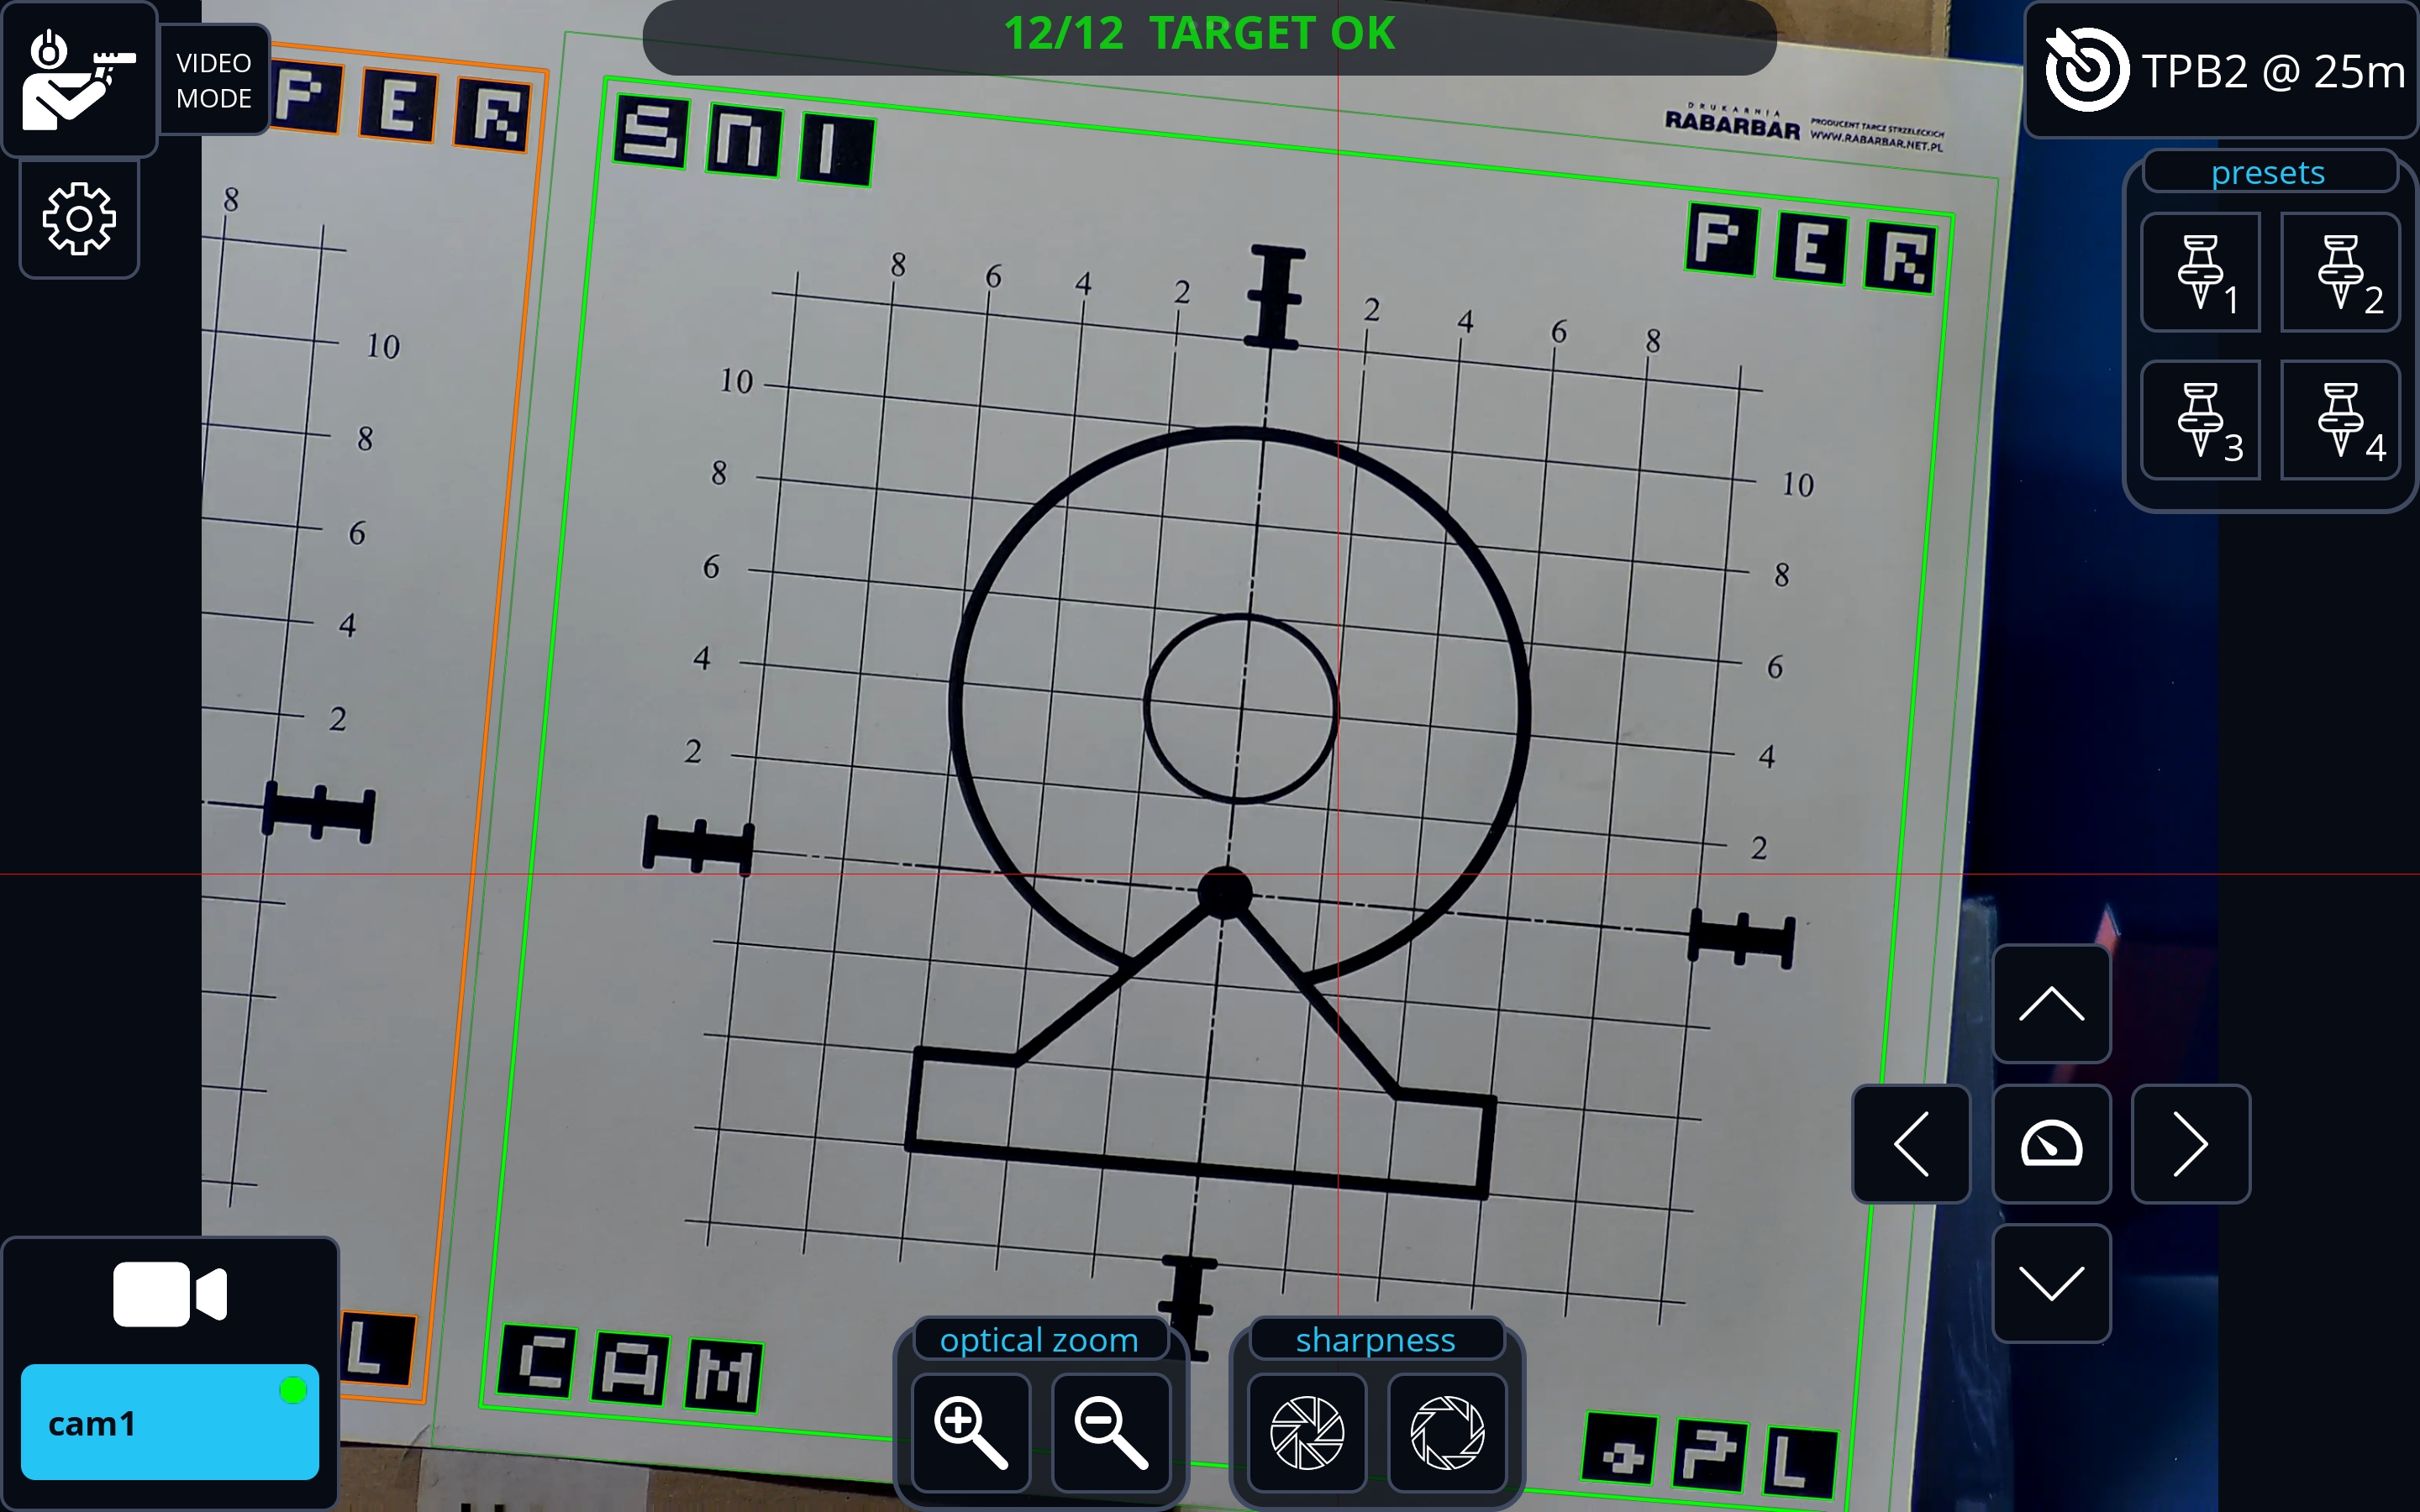
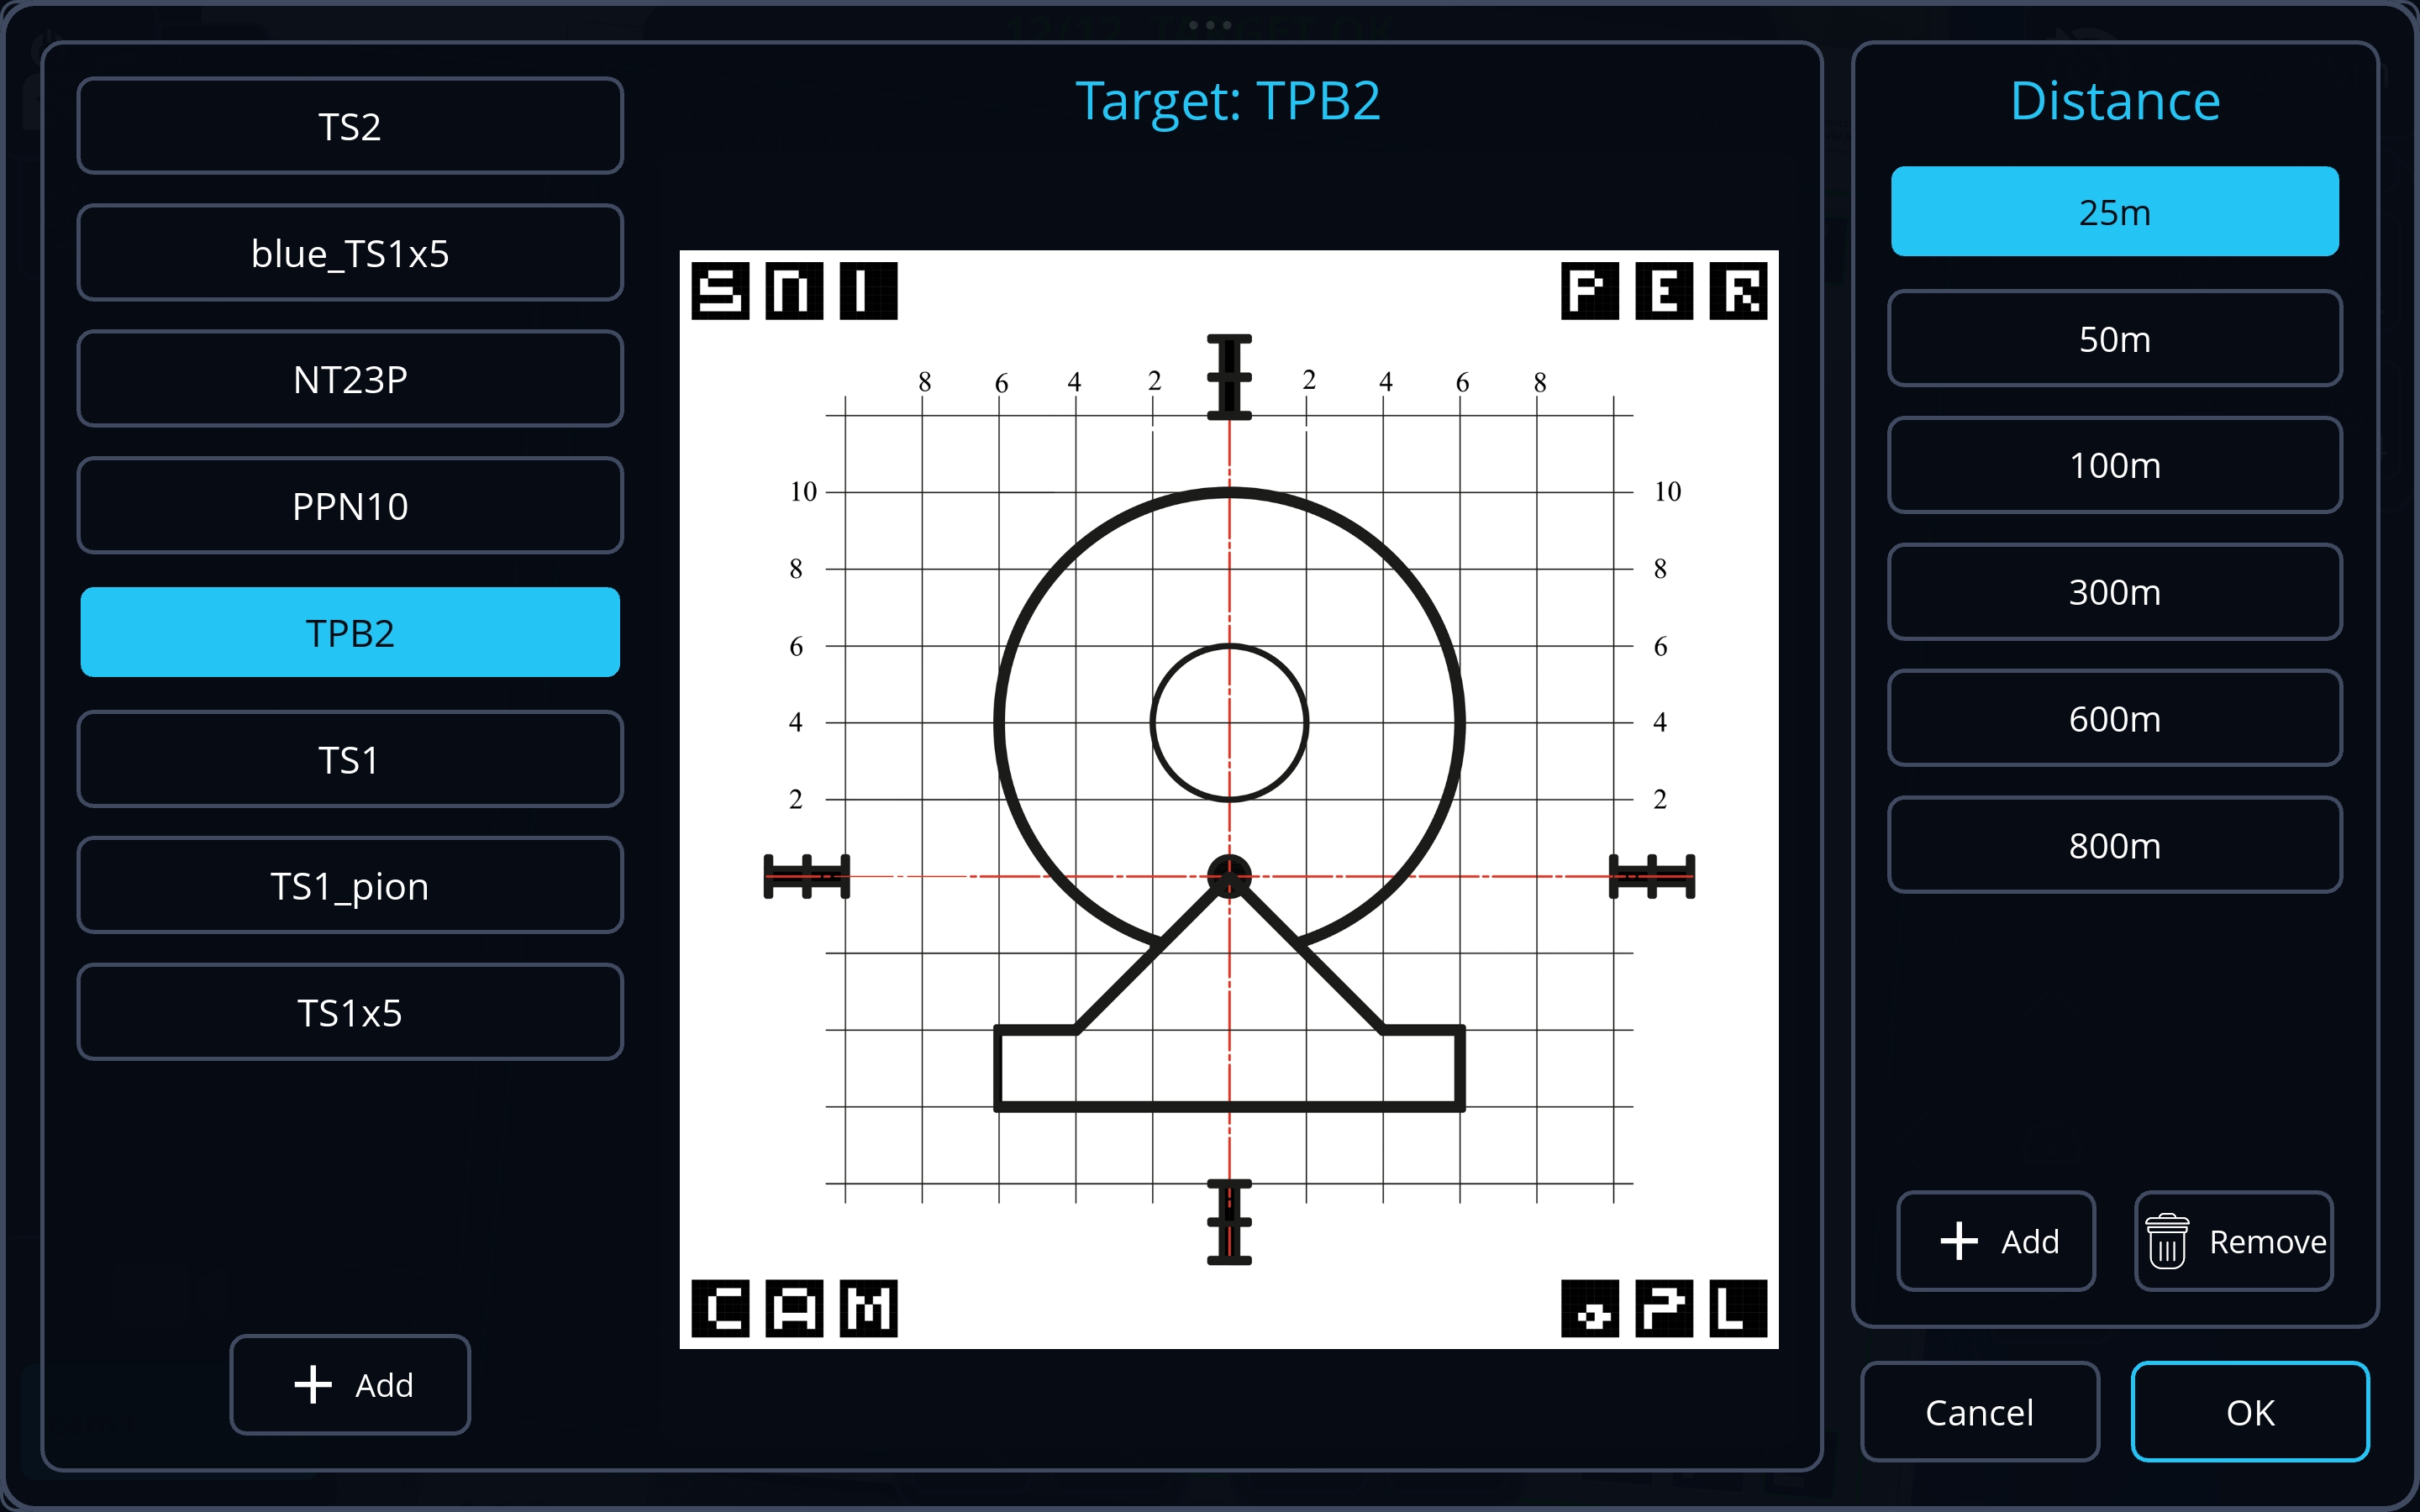
Select the target tile in the upper-right corner. Choose the exact paper target and shooting distance, then confirm with OK. The example uses TPB2 at 25 m.
An incorrect target type or distance can prevent reliable correction and scoring.
When the setup view reports TARGET OK, select the button with the shooter icon in the upper-left corner. The application rectifies the target perspective and opens the view used for hole detection and scoring.
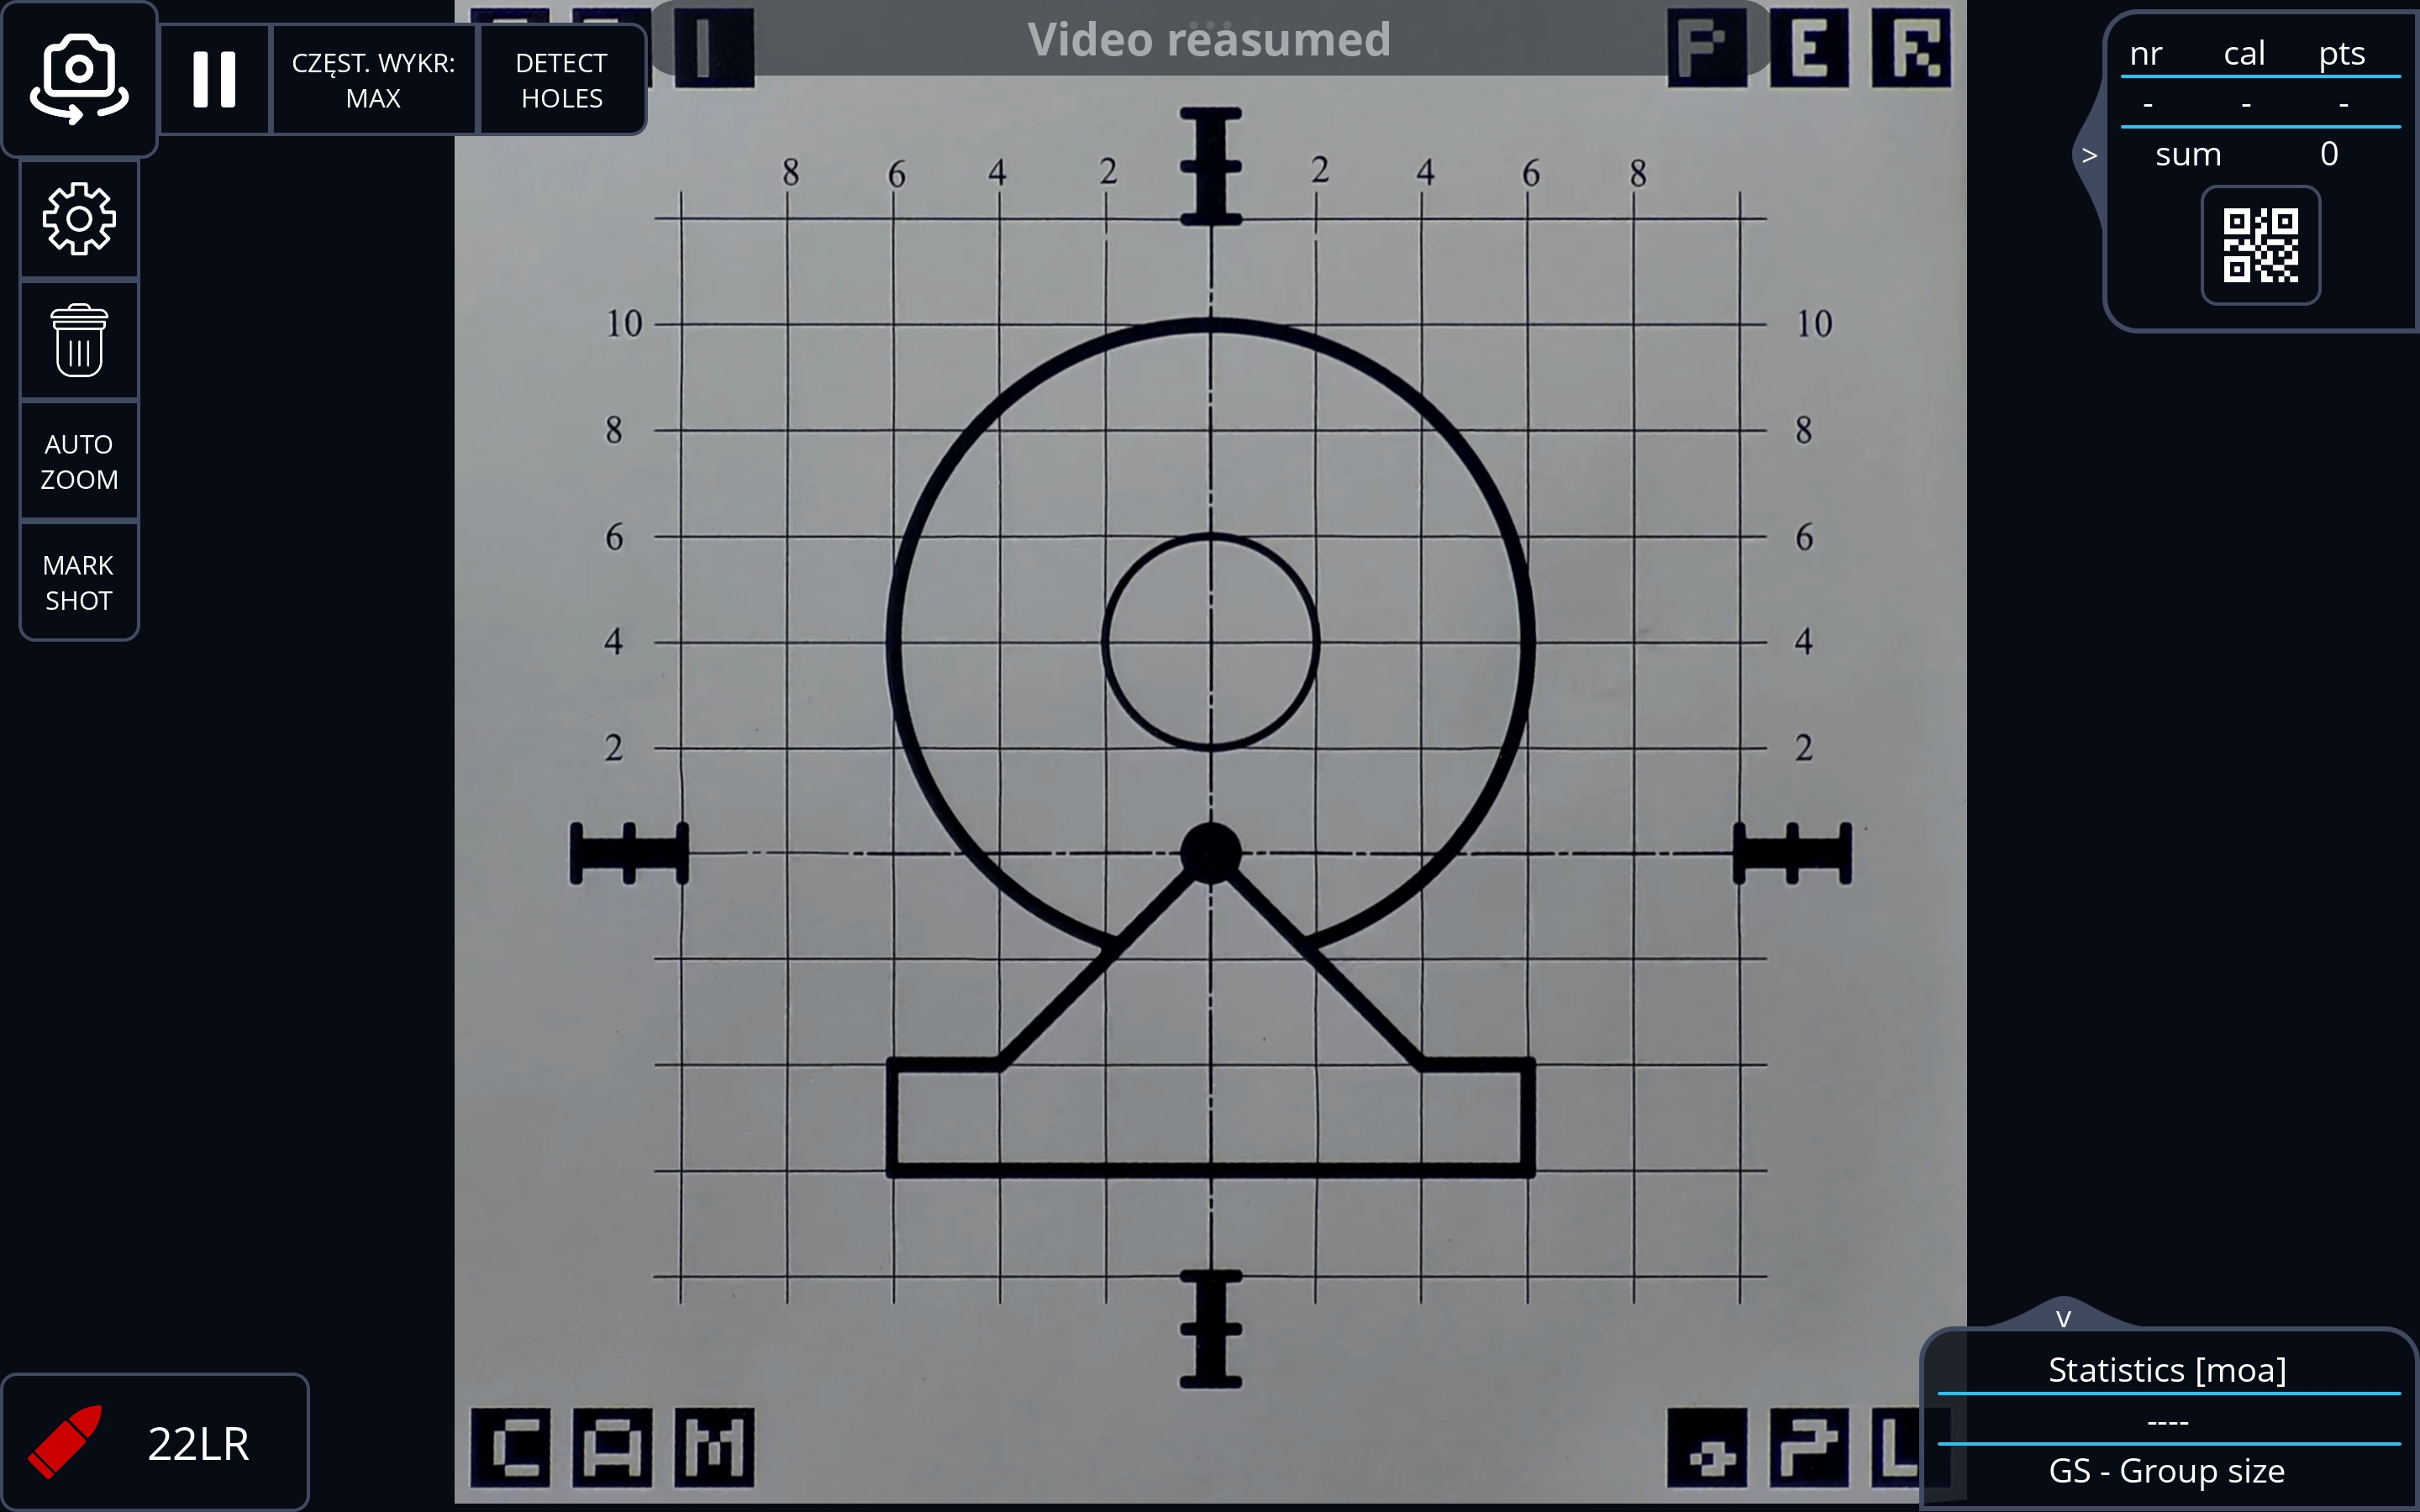
Setup complete
Keep the camera and antennas stationary. Begin shooting only after following all range commands and local safety rules.
Quick checks
Start with power and radio indicators, then check the tablet connection and target configuration.
Confirm that the USB-C plug is seated and the blue power indicator is on. The network usually appears after approximately three minutes, but Radar Detection can extend the wait. If radar was detected, a DFS channel remains blocked for at least 30 minutes.
Reconnect and confirm that the tablet should stay connected even without Internet access. Do not select another saved network during the session.
Verify that the tablet is still connected to the correct SniperCam SSID. Check the camera's radio indicators, then restart the application.
Check that the complete target and every marker are visible. Improve sharpness, reduce excessive zoom, and confirm the selected target type and distance.
Realign both directional antennas and clear the radio path. Confirm that the camera shows a completed link to the Long Range unit.
If the problem remains, record the SSID, camera name, indicator state, setup type, and a screenshot of the application before contacting SniperCam support.